Monday, April 26, 2021

Pinwheel Block Challenge - REVEAL - Pinwheel Posies Wall Hanging

I'm super excited about the Pinwheel Block Challenge Reveal!  This project has taken several twists and turns and I can't be more pleased about how it turned out.

Without any further delay, please meet the Pinwheel Posies Wall Hanging!  I've been putting on the finishing touches and taking photos of Pinwheel Posies today and even have the pattern available so you can make your own version. 


All the Spring flowers are influencing my designs right now.  Last week I almost spilled the beans and shared it with you but I kept quiet.  To catch the previous Pinwheel Block Challenge posts, follow this link and you can see how I re-imagined the basic pinwheel block. 

I'm adding more photos and details about how I made Pinwheel Posies at the bottom of this post, so be sure to keep scrolling. 

I can't wait to see all the desinger's reveals today. Be sure to follow each of the designers so you don't miss their posts during this fun challenge.

Here is the list of Instagram handles of the participating designers for this challenge.  

@tamarinis

@seamslikeadreamquilts

@blueberry_backroads

@masterpiecequilting

@southwind_quilts 

@katiemaequilts

@dragonflysquiltingdesignstudio

@prettypiney

@debbiewendtquilting

@appliques.quilts.and.more

@sue_duckcreekquilting

@patchworkbreeze

@swanamity

@faithandfabric


If you are enjoying the block challenges as much as I am, stayed tuned for May when we re-imagine a Log Cabin block! 

If you would like to see more of my patterns, tips and techniques delivered weekly to your inbox, be sure to sign up for my weekly Masterpiece Quilting Studio News email.  It's free of charge and I promise your email is safe with me.


I used Michael Miller Cotton Couture solids to make the wall hanging. The flower colors match perfectly with the fabrics. My daffodils have wilted but the "ruffle" around the pinwheel circles was inspired by the outer petals of the daffodils.


To add a lot of dimension, I used two layers of batting. A thin cotton on the bottom so it hangs flat and a layer of wool on top. This gives a lot of stitch definition and makes the posies pop out from the quilt.


I used a bright variated thread with a short color repeat to machine stitch the applique shapes.  I used a machine applique / buttonhole stitch for the pinwheel circles.  I tried it on the petals but thought it was a bit too much.  So I ripped it out and switched to a reduced straight stitch. 


PDF Digital Download patterns for Pinwheel Posies are available in my Etsy shop.  (Print patterns will be coming soon!)  Here is a direct link to the PDF pattern. 


If you would like to see more of my patterns, tips and techniques delivered weekly to your inbox, be sure to sign up for my weekly Masterpiece Quilting Studio News email.  It's free of charge and I promise your email is safe with me.


Wednesday, April 21, 2021

Tips & Tricks for Stitching Tiny Pieces

I've been working on a project with lots of little bitty, teeny tiny pieces this week and I thought this would be a great time to share some my favorite tips and tricks for stitching tiny pieces. 

These little stars finish at 2" x 2" so most of the pieces are cut at 1" x 1".  


Yes, that's a lot smaller piece than I normally work with - so in order to achieve success I made a few adjustments in my sewing process.  

1. Reduce stitch length.  I normally piece patchwork quilts using a 2.5 mm stitch length.  For these smaller pieces, I decreased the length to 2.0 mm. 

2. Use a thin thread.  I'm stitching with a 50 weight thread, specifically Superior Threads So Fine, that I typically use as bobbin thread on the longarm.  A thinner thread takes up less space in the seam and allows you to press flatter.  Don't be afraid to use a 60 weight either.  Just because the thread is thinner, doesn't mean it isn't strong. 

3. Use a stilleto to hold the fabric when stitching.  Yes, I'm one of those people who have been known to get their finger nail a little too close to the presser foot but in this case there simply isn't enough space to hold the fabric in place with a finger. 


4. Use a stilleto to hold the fabric when ironing.  I don't know which is worse - a stitched finger or burnt finger but the stilleto is the answer to both!  If you don't have a stilleto, then the eraser end of a pencil or a chopstick will hold the fabric in place and, most importantly, keep your skin away from the iron. 

5. Speaking of ironing... I always use a pressing spray on small pieces.  Starch, starch altnernative, pressing spray - the choice is yours - but using it helps hold the pieces flat. 

6. Press seams open to reduce the bulk on the backside of the unit. 

7. Make a couple extra units.  When sewing small, I always cut and stitch a few extra units. Inevitably one of them will be wonky beyond repair and it's no fun ripping out 2.0 mm stitches.  Since they are small, they can easily fall off your work surface and the dog can grab them. Once you have wrestled a 1" x 1-1/2" flying geese unit out of your dogs mouth there is no recovery option for it!  True story! 

8. Use a small tray, plate or plastic container to keep all the pieces together.  I like the small plastic take-out food containers with lids.  I put all my cut pieces into it as I cut, then transport to my sewing table.  The pieces go back into it when I go to the ironing board.  If I'm leaving a project for a few days, I can pop the lid on it to make sure everything stays together.  I use these same containers for my applique pieces too. 


So the next time you work on a project with small pieces, I hope these tips and tricks will be useful to you! 


If you would like to see more of my patterns, tips and techniques delivered weekly to your inbox, be sure to sign up for my weekly Masterpiece Quilting Studio News email.  It's free of charge and I promise your email is safe with me.

Monday, April 19, 2021

Pinwheel Block Challenge - Sneak Peek #2

This week I'm sharing Sneak Peek #2 of the Pinwheel Block Challenge.  

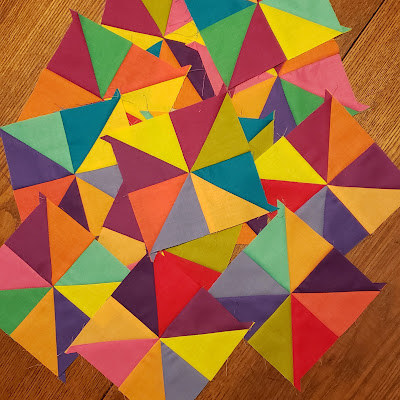
Last week for Sneak Peek #1, I shared my stack of beautiful pinwheel blocks.  


If you are finding this post for first time and don't have a clue what I'm posting about (it's okay, it happens), here is the link to last week's post so you can learn more about the pinwheel block challenge.   

I'm using Michael Miller Cotton Couture in the Sew Colorful Colorwheel collection to make my blocks.   I have both fat 1/8 and fat quarter bundles available in my Etsy shop - both bundles have shipping included in the price!

Fat 1/8 bundle of 18 solids

Fat quarter bundle of 18 solids

This week the reimagining happened.  My pinwheel blocks have turned into Pinwheel Circles! 


And what do I spy on the back of the circles?  Fusible web?  


Oh my!  You don't want to miss next week's reveal to see the project I'm making using these pinwheel circles.  And if everything goes as planned - there will be a new pattern released for this project too :)   

Just between you and me - I'm super excited about this project ... it is turning out mega cool ... like it's really hard for me not to share the whole thing with you now .. but I gotta wait! 

I can't wait to see all the desingers sneak peeks today. Be sure to follow each of the designers so you don't miss their posts during this fun challenge.

Here is the list of Instagram handles of the participating designers for this challenge.  

@tamarinis

@seamslikeadreamquilts

@blueberry_backroads

@masterpiecequilting

@southwind_quilts 

@katiemaequilts

@dragonflysquiltingdesignstudio

@prettypiney

@debbiewendtquilting

@appliques.quilts.and.more

@sue_duckcreekquilting

@patchworkbreeze

@swanamity

@faithandfabric


If you would like to see more of my patterns, tips and techniques delivered weekly to your inbox, be sure to sign up for my weekly Masterpiece Quilting Studio News email.  It's free of charge and I promise your email is safe with me.


Here are the quilts I made in the previous block challenges. 


Snowbound - Snowball Block Challenge


PDF and Print Patterns available in my Etsy shop. 


Split Fences - Rail Fence Block Challenge


Free pattern available for digital download.


Friday, April 16, 2021

Where is Nancy?

I've always loved "I Spy", "Where's Waldo" or "Search-and-Find" type games.  I can spend hours looking at the pictures trying to find the clues.  

But in real life, it isn't always fun playing that same game trying to find a photo or a post you saw earlier on social media but you can't find it again.  

For me it normally involves me seeing a really neat quilt and I wanted to see more of the post but I was on my phone and didn't have my glasses.  When I'm on my desktop with the big monitor and a full keyboard where I can comment more easily, then I can't find the post.  Yes - it is frustrating! 

I don't want you to go through that same frustration. 

Today I'm sharing all the sites where I post on social media. I know not all social media is for everyone so that's why I try to share in a variety of places. 


Facebook

Instagram

YouTube

Pinterest

Blog

Etsy Shop


The best option for you to see my posts is to go to my page on each of the sites that you use and to click "follow", "like" or "subscribe".  It's a game we have to play with social media.  The greater the number of "followers" and people who "like" my pages, the more my page is shown to everyone.   Trust me, I don't make the rules to the game, but I've learned the hard way how to play the game. 

Since social media likes to change the rules of the game frequently and normally without notice, I started sending out weekly emails.  

If you would like to see more of my patterns, tips and techniques delivered weekly to your inbox, be sure to sign up for my weekly Masterpiece Quilting Studio News email.  It's free of charge and I promise your email is safe with me. 


Wednesday, April 14, 2021

Trying New Things - Courage Comes Before Confidence

Today on the blog, I'm deviating from my typical post about a specific project to talking about how we approach new projects  - quilting or anything new in life. 

Many times when faced with trying something new, we (myself included) immediately shy away from the project with excuses, flashbacks from failed previous attempts and a whole host of other reasons why we can't do it.  I've seen this in online quilting groups, I've seen this in classes I've taught, I've done this myself.  

Somedays we are our own worse enemy.  Instead of encouraging ourselves, we assume this "I can't do it" attitude and close the door before we even take a look inside. 


In quilting, project skill levels are frequently assigned as beginner, then confident beginner.  To become confident, one must first have the courage to try.  

I started quilting when I was a teenager with my grandmother as my instructor. I cut fabric using cardboard templates, machine pieced and handquilted each project.  I went off to college, Grandma passed and I didn't seriously quilt again until I was in my late 30's.  Oh my, things had changed in the quilting world!  

I remember seeing a paper-pieced quilt in a quilt show and was in love with the detail and precision and I wanted to make quilts just like that.  Well, my first paper-piecing experience didn't turn out well.  I had fabric stitched to both sides of the paper!  It was a complete failure and I swore off paper-piecing.  Every so often I would try again with better results each time. Now I would consider myself a Confident Paper-Piecer ... but only because I had the courage to try and try again.  Now I have the confidence to not only make but to design paper-piecing patterns, check out my Perfectly Potted Wall Hanging in the Summer 2021 issue of Quilter's World Magazine. 

When I made my first quilted wall hanging (read all about it here), I didn't know that Y-seams were suppose to be hard.  I liked the look of the project in the magazine, I followed Grandma's instuctions and I machine pieced Y-seams.  Was I courageous? Not necessarily.  It was more a case of Grandma encouraging me to make what I wanted to make instead of telling me that I can't do it.  

Read that last sentence again.... She encouraged me to make what I wanted to make .... instead of telling me that I can't do it.  

How many times have we told someone they shouldn't do something because it is hard?  How many times have we told ourselves we shouldn't do something because it is hard?  

Yesterday I blogged about the month's Old School Block of the Month using English Paper Piecing.  Is this a technique I use everyday?  No.  I've done it before but did every hexie turn out perfect?  No.  Is the method in the tutorial the same as I used before?  No.  Am I courageous enough to try EPP again using a new method?  Yes.  What is the worse that happens?  I advance to becoming a Confident EPP-er!  That sounds pretty exciting to me. 

I'm not sure why I felt the need to share on this topic today.  I went to bathroom at 2 a.m., laid back down in bed and the ideas popped into my mind.  So 5 hours later, here I sit at the kitchen table, typing them out before I have breakfast.  

I challenge each of you to be courageous today.  Try something new.  And encourage others to be courageous too. 


If you would like to see more of my patterns, tips and techniques delivered weekly to your inbox, be sure to sign up for my weekly Masterpiece Quilting Studio News email.  It's free of charge and I promise your email is safe with me. 


Tuesday, April 13, 2021

Old School Block of the Month - English Paper Pieced Hexagon Block

On the 12th of each month, the tutorial for the Old School Block of the Month is released.  This month is Hexagons using English Paper Piecing.  I'm so excited to work on this block, it's been a while since I did any English Paper Piecing.  

The designer for this month is my friend Missie Carpenter of Traditional Primitives. Missie is the guru of handwork, wool applique, punchneedle, English Paper Piecing and all those things I very rarely do - so it's great fun to be in her world this month and to learn from her expertise in this area.  Her color palette and mine are on opposite spectrums so I'm excited to follow her tutorial and make her design in my colorway.  That's the fun of quilting - learning new things but adding your own personality along the way. 

Here is the link to Missie's Hexagon Block tutorial for this month. 

If you are finding this blog post for the first time and want to join the Old School Block of the Month, we would love to have you!  Here is a link to Kim Lapacek's January block and here is the link to my February block tutorial.  You can find the Facebook group here

Normally I make the block before I post about it but that didn't happen this month. And it's okay - life happens.  

This morning I started gathering my supplies.  I'm working from my stash but I am intriqued by the fussy cut option for the center of the block.  I have never done that before!  I'm learning something new and that is the whole point of this Block of the Month, to learn new techniques. 


While my plan was to use stash fabrics for this BOM, I think I will need to purchase a fussy cuttable fabric in my chosen pink-blue-white colorway.  Which is fine because I have been wanting to re-do my March block so I could use the same fabric in both blocks!  Or else I need to dig through my stash a little harder!  If you don't hear from me for a few days, I maybe lost in my stash :) 

Here are my first 3 blocks.  


If you would like to see more of my patterns, tips and techniques delivered weekly to your inbox, be sure to sign up for my weekly Masterpiece Quilting Studio News email.  It's free of charge and I promise your email is safe with me. 

Monday, April 12, 2021

Pinwheel Block Re-Imagined Challenge - Sneak Peek #1

It's Monday and you know what that means - Sneak Peek #1 of the Pinwheel Block Reimagined Challenge!  While it would be fun to cue the drum roll, I'll save that for next week when I share how I have re-imagined the blocks.  

This week I'm sharing a pile of traditional bright colored pinwheels made with Michael Miller Cotton Couture solids.  I mixed up all the colors from the bundle so my pinwheels have a super scrappy look. 


If you are finding this blog post for the first time and haven't heard of the Pinwheel Block Re-Imagined Challenge before, last week's blog post has all the details and will get you up to speed. 


If you want to use the same fabrics that I am using , they are available in my Etsy shop. 

18 Fat Quarter Bundle Sew Colorful Colorwheel

Powderblue Solid Yardage

Candlelight Solid Yardage 


Here is the list of Instagram handles of the participating designers for this challenge.  

@tamarinis

@seamslikeadreamquilts

@blueberry_backroads

@masterpiecequilting

@southwind_quilts 

@katiemaequilts

@dragonflysquiltingdesignstudio

@prettypiney

@debbiewendtquilting

@appliques.quilts.and.more

@sue_duckcreekquilting

@patchworkbreeze

@swanamity

@faithandfabric


I can't wait to see everyone's sneak peeks today. Be sure to follow each of the designers so you don't miss their posts during this fun challenge.


If you would like to see more of my patterns, tips and techniques delivered weekly to your inbox, be sure to sign up for my weekly Masterpiece Quilting Studio News email.  It's free of charge and I promise your email is safe with me. 


PS - I had too much fun taking photos, so here is another one! 


Thursday, April 8, 2021

Spring Clearance Fabric Sale - Shop Now - Limited Inventory

It's time for some Spring Cleaning in my Etsy shop!

New patterns are being released, New fabrics arrived last week, New kits are being bundled and I need space for all these new things. 

Here are some low inventory items that won't be restocked and I would love for them to go to new homes.  Shipping is included in the price.  

Many have only 1 or 2 available, so don't wait to purchase! 

I've tried to include photos but if there isn't one - just click on the item name - it's a direct link to the item listing.  

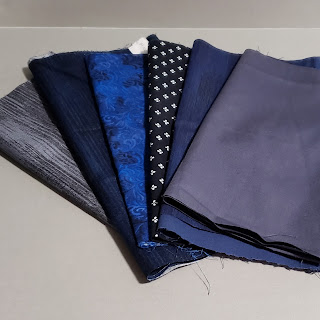
6 Fat Quarter Bundle Homespun Fabrics


Learn to Make a T-shirt Quilt DVD


6 Fat Quarter Bundle Assorted Pink Quilting Cottons


Tula Pink 1 yard cut Tent Stripe


Learn to Machine Bind Your Quilt DVD

Tuesday, April 6, 2021

Spring Cleaning & Getting Ready for Summer Sewing

Yep - Spring fever has hit me!


I spent some time over the weekend cleaning in my studio, windows open, music blarring and that sure felt good!  

I have a bad habit of stacking the leftover fabric when I finish a project and when the stack falls over, I plop it into a tote and then keep adding more fabric until the tote is full.  What I end up with a multi-season, multi-color mess of stash fabric that is hard to sort through without dumping the whole tote.  Please tell me I'm not the only one who does this.  

So before the stack fell over (it was close ... really, really close!), I decided to sort the fabric by size and by color.  Anything larger than a 1/2 yard goes in a seperate tote and the smaller pieces are sorted by color and fabric type.  

This summer I'm making a scrappy quilt using precut 2-1/2" strips.  So I took it a step further and cut the leftover fabric that fits that quilts colorway into 2-1/2" strips.  It didn't take me long to cut the fabric and the task of putting away the fabric that didn't fit the colorway was a lot easier too.  

Now I have a head start on making this quilt.  As it gets warmer, I know I will be spending more time outside working in the yard and my sewing time will be less.  It's nice to have a project precut so I can easily spend my time sewing without having to stop, dig through my stash, press and cut fabric.  

If you are looking for quilts that would be great for summer sewing take a look at these three options.  All are quick and easy to make and can be as planned or scrappy as you want them to be! 


Peacock Proud is designed for precut 2-1/2" strips.  Grab a bundle or cut from your stash for a quick and easy project. 

PDF Pattern:

Print Pattern: 


Sunburst Strips & Squares looks amazing in any colorway!  This best-selling pattern will become one of your favorites too. 

PDF Pattern: 

Print Pattern: 


For the ultimate stash-buster, Stepping Out is full of color and super easy to make, even for a beginner.  What a great way to share your love of quilting with someone else this summer. 

PDF Pattern: 


If you would like to see more of my patterns, tips and techniques delivered weekly to your inbox, be sure to sign up for my weekly Masterpiece Quilting Studio News email.  It's free of charge and I promise your email is safe with me. 

Monday, April 5, 2021

Pinwheel Block Challenge - Fabric Pull

I'm excited to be part of the Pinwheel Block Challenge during April.  If you have been following along, a group of quilt pattern designers are challenging each other to re-imagine and re-interpret a traditional quilt block.  Talk about fun!  It has been amazing to see each designer take the traditional block and add their own spin on it.  

Here are links if you want to take a look at the quilts I made during the Snowball Block Challenge and the Rail Fence Block Challenge.  

Each Monday in April, the participating designers will be sharing about the challenge on their Instagram feeds.  Some of us are adding other social media too.   If you don't already follow me on Instagram, I'm @masterpiecequilting 

This week I'm sharing the fabrics that I'm using for the challenge.  My quilting style is modern traditional so I'm making my version of the traditional pinwheel block using bright, modern solids.  I've grabbed a fat quarter bundle of Michael Miller Cotton Couture Sew Colorful Colorwheel and am pairing it with Powderblue and Candlelight solid yardage.  And yes, these fabrics may look familiar, it is the same group I used for my Snowball Block Challenge.  

If you want to use the same fabrics that I am using, they are available in my Etsy shop. 

18 Fat Quarter Bundle Sew Colorful Colorwheel

Powderblue Solid Yardage

Candlelight Solid Yardage 

Here is the list of Instagram handles of the participating designers.  Each of us are sharing our fabric pull and / or color scheme on Monday April 5th.  

@tamarinis

@seamslikeadreamquilts

@blueberry_backroads

@masterpiecequilting

@southwind_quilts 

@katiemaequilts

@dragonflysquiltingdesignstudio

@prettypiney

@debbiewendtquilting

@appliques.quilts.and.more

@sue_duckcreekquilting

@patchworkbreeze

@swanamity

@faithandfabric


I can't wait to see what everyone is selecting for their fabrics and I hope that you will take a look too! Be sure to follow each of the designers so you don't miss their posts during this fun challenge.


If you would like to see more of my patterns, tips and techniques delivered weekly to your inbox, be sure to sign up for my weekly Masterpiece Quilting Studio News email.  It's free of charge and I promise your email is safe with me.