Monday, June 28, 2021

Churn Dash Block Challenge - The Reveal

This may be the most anticipated reveal I've done for a while!  Partly because I was making this quilt without a pattern - in other words, I was making it up as I went - LITERALLY :)  And no, I didn't know how it was going to fit together until I was actually sewing it! 

Here is the finished top of my Churn Dash quilt! 


I've been saying that I was going Modern with this month's design and mega modern it is!  

While I describe myself as a modern traditional quilter every once in a while (about once a year) I go mega modern with a quilt design.  It's fun to push myself to create and design a quilt totally outside the box. 

At this time I'm not planning to write a pattern for this quilt.  There are a lot of y-seams as I was assembling it in sections.   Here is the computer generated sketch that I was working from where I had placed different elements of the quilt - remember those pieces and parts from the last 2 weeks.  While I was assembling the quilt, I had to figure out the math to connect all the sections together.  


And if you have been looking closely at the photo, you have already noticed that the edges aren't even.  It's okay.  I will actually quilt the quilt with the edges uneven and then square everything up after the quilting is done.  

During the quilting process, parts of the quilt may pull in more than other areas due to the density of the quilting - so this gives me some wiggle room on the edges.  

For the quilting - I don't have an exact plan yet.  I kinda have a general feel for what I want the finished quilt to look like.  I plan to use this as a competition quilt, so it will be full custom quilting.  No worries - I'll post in-progress photos as I'm quilting.  

While the majority of the time, my projects are very planned, this one wasn't and that's perfectly okay.  There is a thrill, a challenge to working by the seat-of-one's-pants!  

If you are finding this blog post for the first time and haven't heard of the Churn Dash Re-Imagined Challenge before, last week's blog post has all the details and will get you up to speed. 

I can't wait to see everyone's sneak peeks today. Be sure to follow each of the designers so you don't miss their posts during this fun challenge. 

@tamarinis

@katecollerandesigns

@quilterstreasurechest

@masterpiecequilting      

@ttquilts

@patchworkbreeze

@southwind_quilts

@dragonflysquiltingdesignstudio

@discoflamingo

@swanamity

@cherryblossomsstudio


If you would like to see more of my patterns, tips and techniques delivered weekly to your inbox, be sure to sign up for my weekly Masterpiece Quilting Studio News email.  It's free of charge and I promise your email is safe with me. 

Monday, June 21, 2021

Churn Dash Block Challenge - Sneak Peek #2

Are you ready?  

It's time for me to share Sneak Peek #2 of my Churn Dash Block Challenge! 

I've made a lot of progress from last week's pieces and parts!  This week we have blocks :) 


And yes, there are still a few pieces and parts.  You'll see where they belong next week.  

Just as you expected from the pieces and parts in a variety of sizes, I have blocks in a variety of sizes and color combinations too. 

Well, I said I was going modern with this one!  And it is a block re-imagined challenge - so everything is fair game :) 

I'm heading out tomorrow to vend at the Shipshewana Quilt Festival through Saturday (If you are at the show, stop by and introduce yourself.  I'll be in the vendor area.)

My game plan is to have just the quilt top finished for next Monday's reveal.  I'm already loving how this quilt is turning out.  (Now might be a great time for you to follow me on Facebook or Instagram if you don't already, so you don't miss next weeks post and so you don't miss the excitement from the Quilt Festival too!) 

If you are finding this blog post for the first time and haven't heard of the Churn Dash Re-Imagined Challenge before, last week's blog post has all the details and will get you up to speed. 

I can't wait to see everyone's sneak peeks today. Be sure to follow each of the designers so you don't miss their posts during this fun challenge. 

@tamarinis

@katecollerandesigns

@quilterstreasurechest

@masterpiecequilting      

@ttquilts

@patchworkbreeze

@southwind_quilts

@dragonflysquiltingdesignstudio

@discoflamingo

@swanamity

@cherryblossomsstudio


If you would like to see more of my patterns, tips and techniques delivered weekly to your inbox, be sure to sign up for my weekly Masterpiece Quilting Studio News email.  It's free of charge and I promise your email is safe with me. 

Friday, June 18, 2021

Masterpiece Prime Sale - June 20 & June 21

It's that time of year when one of the biggest online retailers runs their prime sale.  As a small online retailer, I thought I would do the same!  

The Masterpiece Prime Sale will run on Sunday June 20th & Monday June 21st.  This will give me time to process & ship orders before we leave for the Shipshewana Quilt Festival on Tuesday June 22nd. 

Here are the sale items for this year with the coupon codes for each 

All PDF Patterns (including Halloween Fans!) are 25% off using code: PDF25


Direct Link to PDF Pattern Section

Stash Building Fat Quarter Bundles

I have 4 bundles available: 

  • Bright & Springy Quilting Cotton 
  • Autumn / Primitive Quilting Cotton 
  • Homespun Plaids / Stripes
  • Fall / Autumn / Primitive Flannels

All fabrics are quilt shop quality from leading manufacturers with no duplicates in the bundle unless you request duplicates (such as 10 fabrics with 2 fat quarters per fabric). I will pull a variety of colors for each bundle unless you request that I omit a certain color or include extra of a certain color. I'll try to handle special requests as best I can.

Bundles are currently listed in my Etsy shop for $59.99 ($2.50 per fat quarter + shipping included). Using coupon code: 2DOLLAR they will be on sale for $2.00 per quarter with shipping included in the price. Talk about a DEAL! 

YES, please share this post with your quilting friends. 

I love a good sale and I hope you do too!

Direct Link to $2.50 Fat Quarter Bundle Section in my Etsy shop

Thank you for supporting my small business,

Nancy

Wednesday, June 16, 2021

Frequently Asked Questions - Halloween Fans Quilt Along

Earlier this month I announced the Halloween Fans Quilt Along that starts on July 6th.   To read the previous post, click here


Today, I want to answer some of the questions I've been receiving because if one person has a question, I'm sure others do to. 


What skills do I need to have to participate?

The pattern is designed for a confident beginner and uses both patchwork and raw-edge fusible applique.  You will need to have a basic command of sewing / quilting and knowing how to use both a straight stitch and decorative machine blanket stitch on your sewing machine.  It will be presumed that you understand how to cut using a rotary cutter, cutting grid and mat and have a general knowledge of how a quilt goes together. 

What will we learn in this quilt along? 

Specific topics that we are going to cover include:

  • Accurate cutting 
  • Raw - Edge Fusible Applique (1 whole lesson is devoted just this topic!)
  • Stitching a 1/4" seam
  • Sashing & Cornerstones - getting everything to fit
  • Pieced Borders
  • Quilting - Allover, Semi-Custom and Custom options for this project

What is the cost of the Quilt Along?

There is no charge to sign up for the quilt along and receive the video tutorials and tips & tricks downloads.  

Sign Up for the Halloween Fans Quilt Along

Do I have to purchase the pattern?

Yes, if you plan to make the quilt you will need to purchase the pattern to have the cutting instructions, assembly diagrams and applique templates. 

Purchase PDF pattern 

Purchase Print pattern (shipping included) 

Is there a kit for the Quilt Along?

No, I do not have kits available.  Check with your local quilt shop or online retailer for the Pumpkin Delight collection by Kathy Engle for Island Batik. 

What if I can't get everything done in a week before the next video comes out?

No worries, the video tutorials can be watched 24 / 7 at your convenience.  Just keep the emails with the video links, you can watch them as long as you want. 

What is the registration deadline? 

There isn't a specific cut off date but you will need to sign up before the end of the quilt along.  You can sign up even while the quilt along is going on! 

I suggest signing up early so you can get your pattern purchased, supplies gathered and be ready to start with the first lesson on July 6th. 

Sign Up for the Halloween Fans Quilt Along

Why do you need my email? 

The links to the video tutorials and tips & tricks downloads will be delivered to your inbox each week.  In order to receive them, I will need your email. 


If you have more questions, please leave me a comment or email me: nancy at masterpiecequilting dot com

Tuesday, June 15, 2021

Old School Block of the Month - Economy Pocket Block

On the 12th of each month, the tutorial for the Old School Block of the Month is released.  This month is the Economy Pocket Block.  

I'm gonna be totally honest with you, I had not heard of this block pattern being called the Economy block ... I've always known it as the square-in-square block. Who knew?  Apparently, everybody but me!

The addition of the Pocket is perfect for tucking an item in place.  Great for kids quilts and I'm thinking about using this technique on some upcoming memory quilts that I'm making. 


The designer for this month is Kerry Goulder of KidGiddy.com

Here is the link to Kerry's Block tutorial for this month. 

In the tutorial she has instructions for both a 6" and 12" finished block.  Make 4 of the 6" blocks and join them together to make a 12" block!  Genius! 

If you are finding this blog post for the first time and want to join the Old School Block of the Month, we would love to have you!  Here is a link to Kim Lapacek's January block and here is the link to my February block tutorial.  You can find the Facebook group here

I deviated from my usual colorway - pink, blue and white.  I'm still searching for a fabric that is fussy-cuttable in pink, blue and white.  And yes, I get a bit matchy-matchy, so I'll redo this block to match the March and April blocks that both have fussy cut motifs. 

While searching thru my stash, I did find this cute snail that was perfect for this block.  I know it's a remnant from a Tula Pink fat quarter.  So I pulled the remaining colors to coordinate with the snail print. 


Here's the adorable little snail.  Isn't he cute? 


This was a fun block to make and I'm sure you will enjoy making it too.  Incorporating the folded fabric is something that I haven't done before and after all, that's what this block of the month program is all about - learning new things. 


If you would like to see more of my patterns, tips and techniques delivered weekly to your inbox, be sure to sign up for my weekly Masterpiece Quilting Studio News email.  It's free of charge and I promise your email is safe with me. 

Monday, June 14, 2021

Churn Dash Block Challenge - Sneak Peek #1

Are you ready?  

It's time for me to share Sneak Peek #1 of my Churn Dash Block Challenge! 

Here is where I'm at so far - I have pieces and parts of churn dash blocks! 


Okay - try not to be too disappointed :) 

I actually have quite a bit done.   There are half-square triangle units in a variety of sizes - small, medium, large and EXTRA large.   And they are in a variety of color combinations too!

I have strip sets - in a couple different sizes too. 

And there are center squares - in different sizes and colors too. 

And if you are looking pretty closely, you have already figured out that the parts and pieces don't look like they size up to each other very well.  

Well, I said I was going modern with this one!  And it is a block re-imagined challenge - so everything is fair game :) 

And yes, I'm gonna keep you waiting until next week to see what the blocks look like - so stay tuned for Sneak Peek #2 next Monday June 21st. (Now might be a great time for you to follow me on Facebook or Instagram if you don't already, so you don't miss next weeks post.) 

If you are finding this blog post for the first time and haven't heard of the Churn Dash Re-Imagined Challenge before, last week's blog post has all the details and will get you up to speed. 

I can't wait to see everyone's sneak peeks today. Be sure to follow each of the designers so you don't miss their posts during this fun challenge. 

@tamarinis

@katecollerandesigns

@quilterstreasurechest

@masterpiecequilting      

@ttquilts

@patchworkbreeze

@southwind_quilts

@dragonflysquiltingdesignstudio

@discoflamingo

@swanamity

@cherryblossomsstudio


If you would like to see more of my patterns, tips and techniques delivered weekly to your inbox, be sure to sign up for my weekly Masterpiece Quilting Studio News email.  It's free of charge and I promise your email is safe with me. 

Wednesday, June 9, 2021

Why Did I Quilt What Where - Let's Gather Table Runner

Something that doesn't get talked about a lot is the "why" behind "what" design / motif is quilted "where" on a quilt or in this case, a quilted table runner. 

I just finished quilting the patriotic version of my Let's Gather Table Runner and when I loaded in onto the frame, I thought it would be a quick quilt job.  But it ended up taking much longer as I decided it needed a really polished look included thread changes. 


Here's a breakdown on the "why" I quilted each section the way I did. 

First I started with the background or the solid white. I wanted this area to truly be the background that the rest of the quilt would stand against.  Thus I wanted it to be quilted densely and using white thread.  No distraction here - just a bit of texture and nice and flat.  Originally I intended to do a tighter meander / stipple but swirls came out as I started to move the machine and I was good with that.  All the straight lines in the piecing needed a bit of curviness to contrast with them. 


I have a signature stylized swirl that I use a lot as an allover design so I quilted a miniature version of it in the white fabric.  I added some echo just to help move around the small areas. All the swirls are smaller than a quarter.  I stitched at 12 SPI (stitches per inch) but in hindsight should have bumped up to 14 SPI for a smoother look. 

Next I changed thread to a light blue, which is what I had intended to quilt the rest of the runner using.  I started on the red stars and yuck! The light blue thread screamed against the red fabric.  I quickly grabbed the seam ripper and got rid of those offensive stitches.  Feeling a bit defeated in my plan but knowing I needed to keep quilting, I started in on the light blue triangles.  I knew the light blue thread would work well there. 


All along I knew I wanted the red stars to be the focal point or star of the show (aka quilt) so the quilting that I did the light blue triangles needed to be secondary.  Since the fabric was a busier than the rest of the quilt, I added straight line quilting that would be very functional to keep the table runner flat. 

Side note:  Personally, I like flat table runners, table toppers, table anything.  If I'm placing serving dishes, flowers, etc. on top of it I want it flat so they don't spill.  I'm very intentional on my batting selection for table toppers and opted for Soft & Bright from The Warm Company since it is a low loft batting and because it was white and wouldn't shadow behind the white solid fabric. 

Okay, now those red stars.  By this time, I had recomposed my quilting plan and knew I needed to make another thread change to match the red fabric (Michael Miller Hash Dot - I love it!) 

Somedays simple is best.  Straight line, 1/4" outline inside the stars.  All the quilting in the white and light blue was holding everything in place.  The "less is more" quilting decision allows a bit of poof, a bit of dimension in the stars. 


Since I had already made 3 thread changes, what is one more!  For the dark blue solid,  I opted for a matching dark blue thread. 

Straight line quilting in the outer border and some fun bump feathers in the triangle insets.  The roughly 1/4" spaced straight line quilting really anchored the outer edge of the runner and helps keep it very flat and very straight.  

Yes! The lighting in this photo is terrible but it really shows the dimension and texture of the quilting. 


I repeated the bump feather motif at the end points of the runner to add a bit of visual interest and did a free from bump flower motif in the center of the blocks as a focal point.  Both add a bit of texture to the quilting and some curved line to help break up all the straight lines. 


So there you have it - the "why" and reasons behind my decisions to quilt each section of the table runner the way I did! 

If you want to make your own version of my Let's Gather Table Runner, patterns are available in my Etsy shop. 

PDF pattern for Digital Download

Print Pattern (shipping included)

Patriotic Version Kit

If you would like to see more of my patterns, tips and techniques delivered weekly to your inbox, be sure to sign up for my weekly Masterpiece Quilting Studio News email.  It's free of charge and I promise your email is safe with me. 


Monday, June 7, 2021

Churn Dash Block Challenge - Fabric Pull

The block chosen for June's block challenge is one of my favorite blocks - the Churn Dash. 

If you have been following along, a group of quilt pattern designers are challenging each other to re-imagine and re-interpret a traditional quilt block.  Here are links if you want to take a look at the quilts I made during the Snowball Block Challenge, the Rail Fence Block Challenge, the Pinwheel Block Challenge and the Log Cabin Block Challenge.  I have free patterns available for the quilts I made in the Rail Fence block challenge and Log Cabin block challenge.  Links are in the respective blog posts.  

Each Monday in June, the participating designers are sharing about the challenge on their Instagram feeds.  Some of us are adding other social media too.   If you don't already follow me on Instagram, I'm @masterpiecequilting 

I describe myself as a modern traditional quilter and designer and most times I'm a little more traditional than modern but this month, I'm definitely leaning towards the modern side of things. 

For my fabric pull, I have selected all solids - white, blue and teal.  


It is no secret that I love blue and white quilts and as I started designing this quilt, I was using just blue and white.  But I felt it needed something - so I added a dash of teal (get the pun, dash of teal - churn dash block.... okay, I know, it's bad when you have to explain your own jokes!)  Anyway, the teal really helped make the design pop! 

Here is the list of Instagram handles of the participating designers.  Each of us are sharing our fabric pull and / or color scheme on Monday June 7th.  If you don't already follow me on Instagram, I'm @masterpiecequilting 

@tamarinis

@katecollerandesigns

@quilterstreasurechest

@masterpiecequilting      

@ttquilts

@patchworkbreeze

@southwind_quilts

@dragonflysquiltingdesignstudio

@discoflamingo

@swanamity

@cherryblossomsstudio


Each Monday in June, the participating designers are sharing about the challenge on their Instagram feeds.  Some of us are adding other social media too.   An easy way to find the posts is using the following hashtags.  Just type them into the search box and the posts will show up. 


#churndashblockchallenge

#churndashquiltblock

#morethanjustablockchallenge

#designerblockchallenge

#juneblockchallenge

#junedesignerblockchallenge

#quilt

#quilts

#quiltdesigner

#quiltblock

#quiltblocks


I can't wait to see what everyone is selecting for their fabrics and I hope that you will take a look too! Be sure to follow each of the designers so you don't miss their posts during this fun challenge.


If you would like to see more of my patterns, tips and techniques delivered weekly to your inbox, be sure to sign up for my weekly Masterpiece Quilting Studio News email.  It's free of charge and I promise your email is safe with me. 

Thursday, June 3, 2021

Halloween Fans Quilt Along - Join the Fun!


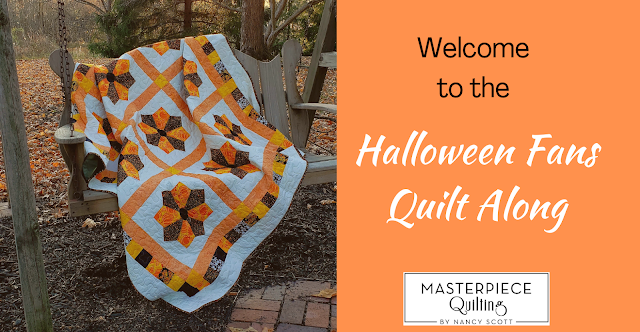
I am so excited to announce the Halloween Fan Quilt Along.  Halloween Fans is one of my latest patterns and is such a fun quilt, ideal for your fall decor and perfect for a quilt along since there are several techniques used to make it. 

It's super easy to participate in the Quilt Along. 

Just click and Sign Up Here 


A question I've been asked a lot lately - Why are we making a Halloween Quilt in July?  

Well, 2 reasons ....  

    1. I want you to have the quilt finished in time for fall decorating.  I want you to be able to use and enjoy the quilt! I normally start my fall decorating in September, so with the QAL ending early August, that gives you another month or so to get the quilt finished.

    2. The Pumpkin Delight fabric collection from Island Batik that I used to make the sample quilt is just now arriving to shops and online retailers.  If you are as smitten with this collection as I am, I want you to be able to get it before it's gone! 

The Quilt Along will run for 5 weeks starting July 6th.  Each week a new lesson including video tutorials and written tips will be delivered to your inbox.  

Here is the complete schedule of what we will be covering each week. 


Direct Link to Sign Up for the Halloween Fans Quilt Along


Another popular question is Why should I join the Quilt Along? 

If you aren't sure what a Quilt Along is, let me share a bit. 

A Quilt Along is when quilters of all ages, from all over the world, with different skill levels come together online to make the same quilt, in this case, Halloween Fans.  It is a great opportunity to develop your own skills, learn something new and make a beautiful quilt while working at your own pace.  The lessons are available 24/7 in the comfort of your own sewing space. 

In terms of skill level, the pattern is rated for a confident beginner, who already has a basic understanding of how to cut fabrics, piece a quilt together and sew with a 1/4" seam.  I'll be diving deep into raw-edge fusible applique techniques and guiding you step-by-step. 

Don't have time to make a big quilt?  That's okay, when you sign up for the Quilt Along, you automatically receive bonus layout diagrams for a 18" x 18" pillow and a 31" x 66" bed runner.  These smaller projects will allow you to participate, learn and increase your skill set without the commitment of a big project.  The layouts and material lists for the smaller projects are exclusive to the Quilt Along and not included in the pattern

Sign Up Now and get the bonus layouts

Purchase PDF Digital Download Pattern

Purchase Print Pattern 

Ready to start shopping? Here is the materials list for all three projects.

You can use any fabrics you want to make the quilt.  I chose batiks but quilting cottons will work equally well.  I've tried to be descriptive with the fabrics I used to help you while shopping. 

Come join in the fun and let's quilt together!

Sign Up Now


Still on the fence? Remember, I will be quilting with you step-by-step.  The video tutorials and written tips will guide you as you work through the pattern.  There are no deadlines, you can work at your own pace.  I've provided the bonus layouts so if you get started and discover a big quilt isn't possible, you can still achieve success with one of the smaller projects! 


Come join in the fun and let's quilt together!

Sign Up Now

Purchase PDF Digital Download Pattern

Purchase Print Pattern 


Still have questions?  Check out my blog post with Frequently Asked Questions.