
I'm super excited to be part of the Summer Scrap Elimination 2022 Tour.
In case we haven't met, I'm Nancy of Masterpiece Quilting. I'm a quilt pattern designer, author and online class instructor. You can learn more about me at www.masterpiecequilting.com or check out my online classes at www.learnfromnancy.com

If you are like me, I'm working on projects all year long and try to keep the studio tidy by plopping all my leftover fabric from one project into a big ole tote with all the other leftover fabrics from other projects. Well after a while, that tote starts overflowing and it's time to eliminate some of them!
This is exactly what happened when I designed my Summer Cabins quilt. I needed a fast and easy quilt to bust through a whole bunch of bright stash fabric.

While Summer Cabins may look complex, it's really easy to make and you can easily make it larger or smaller to meet your needs by adding or subtracting blocks / rows.
Here are the materials needed to make the same size (45" x 68") quilt that I did.
- Total of 2-1/2 yards of assorted bright fabric scraps
- 1-3/4 yards navy solid (or anyother color you prefer)
- 3 yards of 40”-wide backing
- Batting to size
- Basic sewing supplies & quilting tools
Let's start with the cutting instructions. This is for the entire quilt as shown.
From bright fabrics
- Cut 13 (2-1/2” x 4-1/2”) A rectangles
- Cut 26 (2-1/2” x 6-1/2”) F / G strips
- Cut 26 (2-1/2” x 8-1/2”) H / I strips
- Cut 26 (2-1/2” x 12-1/2”) N / O strips
- Cut 26 (2-1/2” x 14-1/2”) P / Q strips
From navy solid
- Cut 13 (1-1/2” x 3-1/2”) C strips
- Cut 26 (1-1/2” x 4-1/2”) B / E strips
- Cut 13 (1-1/2” x 5-1/2”) D strips
- Cut 13 (1-1/2” x 9-1/2”) K strips
- Cut 26 (1-1/2” x 10-1/2”) J / M strips
- Cut 13 (1-1/2” x 11-1/2”) L strips
- Cut 6 (2-1/2” x WOF) binding strips
- Cut 8 (1-1/2” x WOF) strips; subcut into 10 (1-1/2” x 14-1/2”) R short sash strips and 2 (1-1/2” x 68-1/2”) long S sash strips
Each block finishes at 14" x 16" and I made a total of 13 of them. For the partial blocks, I just cut them off even with the other two rows when I assembled them.
Block Assembly
1. Stitch a B strip on the left side of an A rectangle as shown; press toward B.
.png)

4. Join J, K, L and M strips in alphabetical order to the unit completed in Step 3 to complete Round 3, pressing after each new strips is added. Trim and square unit, if needed, to measure 10-1/2” x 12-1/2”.
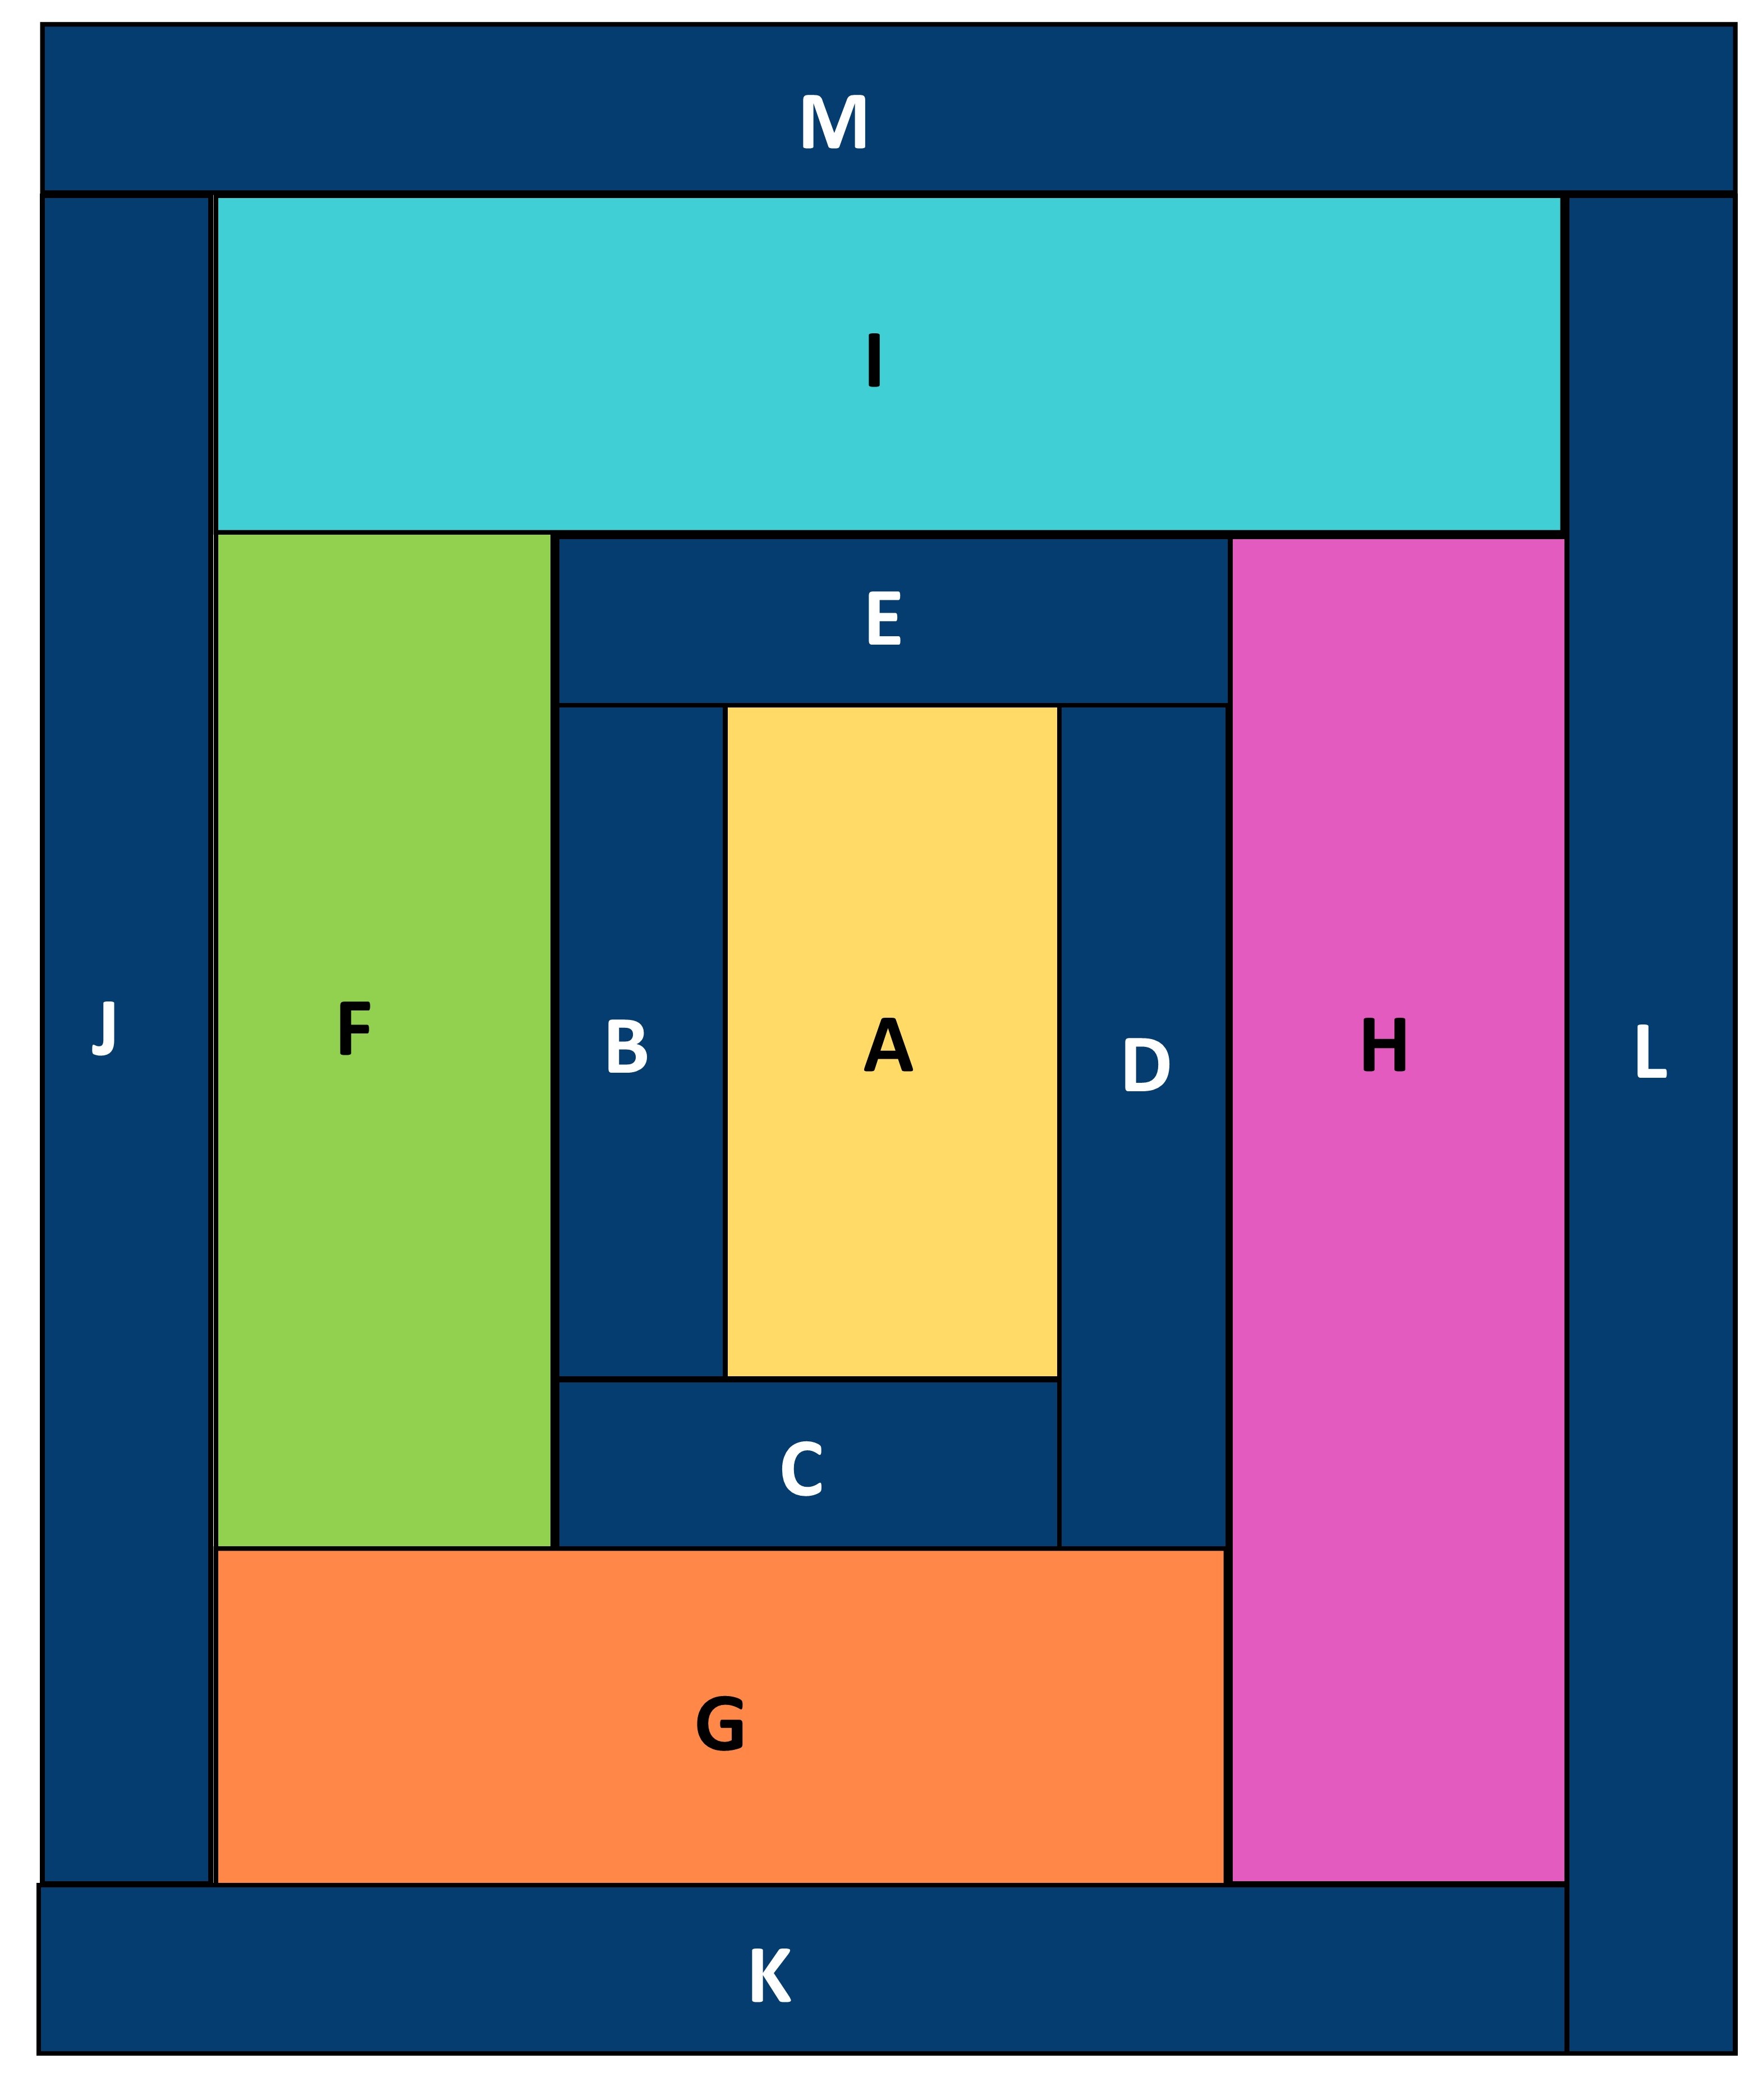
5. Join N, O, P and Q strips in alphabetical order to unit completed in Step 4 to complete one block; pressing after each new strip is added. Trim and square block, if needed, to measure 14-1/2” x 16-1/2”.

6. Repeat steps 1 – 5 to make a total of 13 blocks.
Assembling the Quilt
1. Referring to the Assembly Diagram on the next page, alternately join four blocks and three R strips to make a short side row; press. Repeat to make two short side rows. I rotated the blocks to create a secondary pattern within the rows, but you can arrange them in any fashion.
2. Alternately join five blocks and four R strips to make a long center row; press.
3. Center and arrange the three rows as shown with an S sashing strip between rows. Sew rows and sashing strips together to complete the quilt top; press. Trim excess from each end of the long center row to make it even with the short rows.

For your convenience, I do have the instructions assembled as a PDF digital download. Here is the link to get them sent to you for free.
Yes, I want the Summer Cabins pattern

Be sure to follow all the designers who are participating in the Summer Scrap Elimination 2022 Tour.
@swanamity
@dragonflysquiltingdesignstudio
This is really pretty. Thank you for the pattern. Scrap elimination is a lofty goal since they multiply when you aren't looking.
ReplyDelete